Making Yogurt with the ESP32
Recently, I tried making my own yogurt in an Instant Pot. It involves bringing some milk to a boil, cooling it to ~110°F, mixing in some freeze-dried bacteria, and letting it sit on the counter for a while. Surprisingly, the result of this process is not only edible, but quite delicious.
Cooling it to the right temperature after boiling is very important, and unfortunately the Instant Pot doesn’t have a function to detect when it reaches it. This leaves us with the task of painstakingly surveiling its temperature with a thermometer as it cools. Boring! Luckily, I had a spare ESP32 dev board handy, so we can cook up a deliciously overcomplicated solution to this very minor problem.
The Plan
As always, we need to set some goals for our design:
- Easy to setup;
- Remote (I want to keep an eye on it while we’re doing something else);
- Audible alert when temperature is reached;
- Made mostly of stuff I already have (Let’s put some of the “scrap” I’ve accumulated over the years to good use);
Also, I decided to have some fun and not use any Arduino stuff. Let’s see what we can do with nothing but our wits and a complete hardware abstraction library supplied with the ESP32 toolchain.
Is It Hot in Here?
The one thing I don’t have lying around is a temperature sensor. I remember using the LM35 to good effect, but decided to see if Aliexpress had anything in a watertight case with leads.
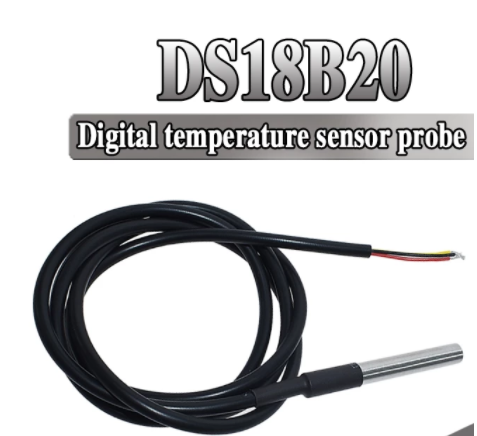
Alright, well unlike the LM35, it’s digital - not analog, but hopefully it uses a well-supported protocol like SPI or I2C.
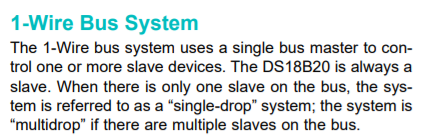
Yes folks, it’s a custom digital protocol. Couldn’t have this being too easy now, could we? The idea behind this one wire protocol is actually pretty clever: It allows the temperature sensor to draw power “parasitically” from the data line instead of from a separate voltage bus, saving you a connection. Also, it’s a multi-drop bus protocol, meaning you can have multiple devices connected to a single data line and ground. Leave your Vcc rail at home!
In our case it will be the only device on the bus, and we’re not packing it onto a tiny PCB so the added power rail isn’t an issue. This simplifies the protocol a bit.
In order to implement the protocol, we need to do the time-honored tradition of bit-banging: Manually setting the data pin low or high (or change it between input and output mode) along with a precise delay to simulate the data format the device expects. For the Maxim 1-wire protocol, the “host” device (the MCU) either holds the bus at 0, or releases it in input mode with a pull-up resistor. We can define two functions to do this:
void OneWireBus::Hold()
{
    gpio_set_direction(_pin, GPIO_MODE_OUTPUT);
    gpio_set_level(_pin, 0);
}

void OneWireBus::Release()
{
    gpio_set_direction(_pin, GPIO_MODE_INPUT);
    gpio_set_pull_mode(_pin, GPIO_PULLUP_ONLY);
}
Then we can read and write bits. Both a 1 and 0 are written by driving the bus low; A 0 is transmitted by just holding the bus low a little longer:
void OneWireBus::WriteBit(bool to_write)
{
    auto lock = AcquireLock();
    Hold();

    if (!to_write) { // Generate a 0 slot - hold the bus a bit longer
        ets_delay_us(80);
        Release();
    } else {
        ets_delay_us(1);
        Release();
        ets_delay_us(80);
    }
}
We use ets_delay_us to make sure we respect the timings outlined in the datasheet. This causes the ESP32 to busy-wait (run in a loop doing nada) for the duration of the delay. If this seems like a waste of resources, that’s because it is, but it’s also a surefire way to make sure we get the timing we need without fiddling with timer interrupts. If every clock cycle counted, we could perhaps use the esp_timer library instead.
You’ll also notice the AcquireLock() method call. This is a wrapper around a FreeRTOS critical section that prevents the task from being context-switched (which would be a disaster for our timing), while also allowing locks to be held recursively and auto-release when the last one goes out of scope.
Once we can read/write bits, we can read/write bytes, and after that it’s a simple manner of actually implementing the high-level protocol: The DS1820 reads the temperature when it is issued a Convert T [44h] command, followed by a Read Scratchpad [BEh] which loads the recorded temperature and some other data from the sensor’s memory.
One nifty feature of the DS1820 is it actually has an inbuilt alarm function similar to what we’re trying to accomplish with the ESP32. For the sake of flexibility, however, I decided to implement the alarm detection in software.
No, it’s not just me, it’s Definitely Hot
Now that we can measure the temperature reliably (with a checksum and everything!), we need a way to make the alarm…alarm us. I had originally mentioned a web interface and thought of playing a sound through there, but who wants to have to keep a browser open? I happened to have a 0.8W, 8Ω speaker and a power transistor in my big pile O’ electronics, maybe that could work?
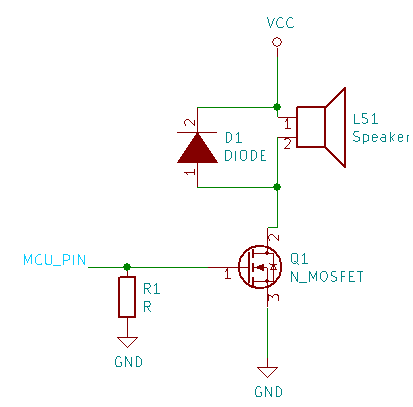
Using our transistor (N-MOSFET), we can make a simple driver circuit for the speaker as shown above. It definitely isn’t professional-grade audio equipment, but it’s more than enough to make an audible beep.
The transistor just has to be able to drive 0.625A (5V/8Ω) and have a “logic level” gate (Vth well below 3.3V).
Resistor R1 helps mitigate the “ringing” effect, where the capacitance of the MOSFET’s gate and the inductance of the wire connecting it form an oscillator. Its value isn’t critical either, usually something fairly high (>100kΩ).
Finally, we have a diode across the terminals of the speaker: Inductors (such as a speaker) like to produce a voltage in proportion to changes in the current flowing through them, which could spell disaster for our poor voltage-sensitive MOSFET when it cuts power to the speaker. The diode prevents this by allowing the speaker to discharge safely through it when the current is interrupted. Once again, its value isn’t very important. I had a 1N5817 lying around (a Schottky diode), which is preferred for this application due to its faster switching time, but I doubt using a silicon diode instead would have hurt anything.
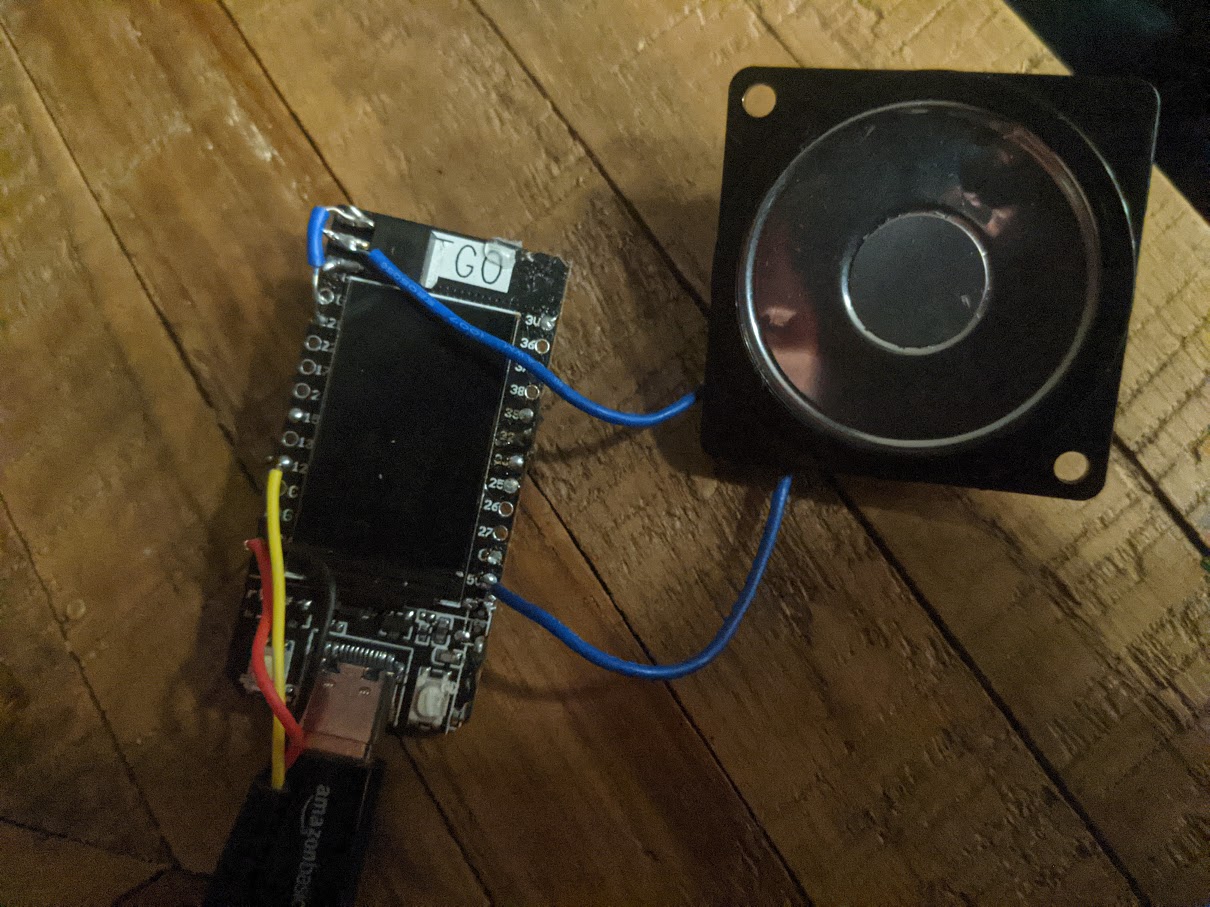
Electronics is fun, but now we’re back to our regularly scheduled programming about…programming. So how do we drive this speaker? Well, the ESP32 has an LED controller (ledc) module that lets us drive a pin at a variable frequency and duty cycle - how simple! In this case we want the duty cycle to be either 0% for off or 50% for buzzing, and we can select a frequency that corresponds to a single note.
The bummer with ledc is that it only has a resolution of 1Hz, and many notes are fractional frequencies. So we won’t be able to make an accurate reproduction of Ride of the Valkyries with this thing just yet. How unfortunate. A fun improvement would be to try to manually configure the underlying timer-counters to support this…
To play the audio, we can spawn a thread pops each “note” to play off a queue, set the output frequency to that of the desired note and the duty cycle to 50%, sleep for the duration of that note, and then set the duty cycle back to zero.
To the Web!
So we have the sensor and the buzzer, now we just need a way to configure the alarm and display the temperature. The ESP32 provides us with a simple HTTP server we can use to serve up a web UI and some RESTful endpoints to configure the alarm/read data.
We can make a simple web UI with some HTML and CSS. I’m definitely not a frontend Web expert, but I was able to concoct something halfway decent in a couple of hours:

The final HTML file, without any uglification or other tricks to shrink it, was around 8k. Can we make it smaller? Browsers will accept GZip-encoded data if you set the right headers, so what if we GZip the Web UI as a pre-compilation step and store the resulting bytes in the program instead?
You Only Pre-compile Once
Usually this sort of thing is best handled by CMake’s add_custom_command, which generates a “pretend” target that runs a command to generate a file. Although PlatformIO uses CMake, it unfortunately does some voodoo with it that doesn’t take too kindly to us adding custom commands. Instead, they expect us to define Python scripts to be run using the platformio.ini file like so: extra_scripts = pre[post]:<script_name>.py. We lose the advantage of leveraging the build system to only recreate the output if the input changes, but the compression is so fast in this case that it’s hardly noticeable.
And of course, Python makes gzipping a file hella easy: compressed_bytes = gzip.compress(open("html/form.html", "r").read().encode('utf-8'))
Then we simply print this as an array of bytes to a source file, and we drop down to an under 2k (from 8k) memory footprint. Cool!
Now we instruct the HTTP server to add the header Content-Encoding: gzip when we send the reply. Technically we’re being naughty here, because we should validate that the client indicated Accept-Encoding: gzip in its request header before we reply with any compressed data. Please don’t tell the cops.
Sending Out an mDns
A web server is great and all, but we would need to know the IP address of the ESP32 in order to reach it. This is a common problem in internet-of-things type devices, and luckily, there’s a well-known solution: Multicast DNS (mDNS)! The short explanation of it is that it’s basically a peer-to-peer DNS service within a local network: When one host wants to resolve a hostname, it broadcasts the request to other hosts within that domain. If one of them matches, it broadcasts its answer to the asker and all other hosts (so they can update their caches).
mDNS domains have the suffix .local. The ESP32 gives us a handy library to set up mDNS, so in a few lines of code, we can have it respond to yogalarm.local:
mdns_init();
mdns_hostname_set("yogalarm.local");
mdns_instance_name_set("Yogurt Alarm");
mdns_service_add(nullptr, "_http", "_tcp", 80, nullptr, 0);
These instructions register a hostname and indicate that there’s an HTTP service on port 80 (TCP). So now if you punch in http://yogalarm.local in a browser, it should find the Web UI page automagically. Android, however, does us dirty: Chrome on Android doesn’t support mDns. A simple workaround is to download one of many free mDNS scanner apps to help us find the device on the network.
Aaand We’re Done!
Congrats, you made it all the way to the end!
The only thing left is to make a nice case to hold this, and then we can keep busy while we wait for our Yogurt to cool. I can’t say I missed the Arduino platform much: I find the HAL provided by Espressif does a more than adequate job of hiding the ugliness of configuring microcontroller peripherals, which makes the Arduino library somewhat redundant. Unfortunately, there are many, many helpful libraries (e.g: DS1820) that we miss out on due to the lack of Arduino support. Oh well, it’s fun to implement things yourself, sometimes :)