A Warm Bed for my Printrbot
At the end of my last post I mentioned that I just needed to make a nice case to hold my little project. I actually have a 3D printer that I use for this sort of thing, and recently I decided to upgrade it.
Good Bot
About 7 years ago, I received a Printrbot Simple Metal: It was created by the eponymous Kickstarter-funded company, and stood out from other 3D printers at the time with its (almost) all-metal construction. It has been a good little printer for me over the years, having required pretty much 0 maintenance of any kind and produces consistently high-quality prints with only a few minor tweaks. One thing it lacks, however, is a heated print surface - also known as a heated bed.
Why Tho?
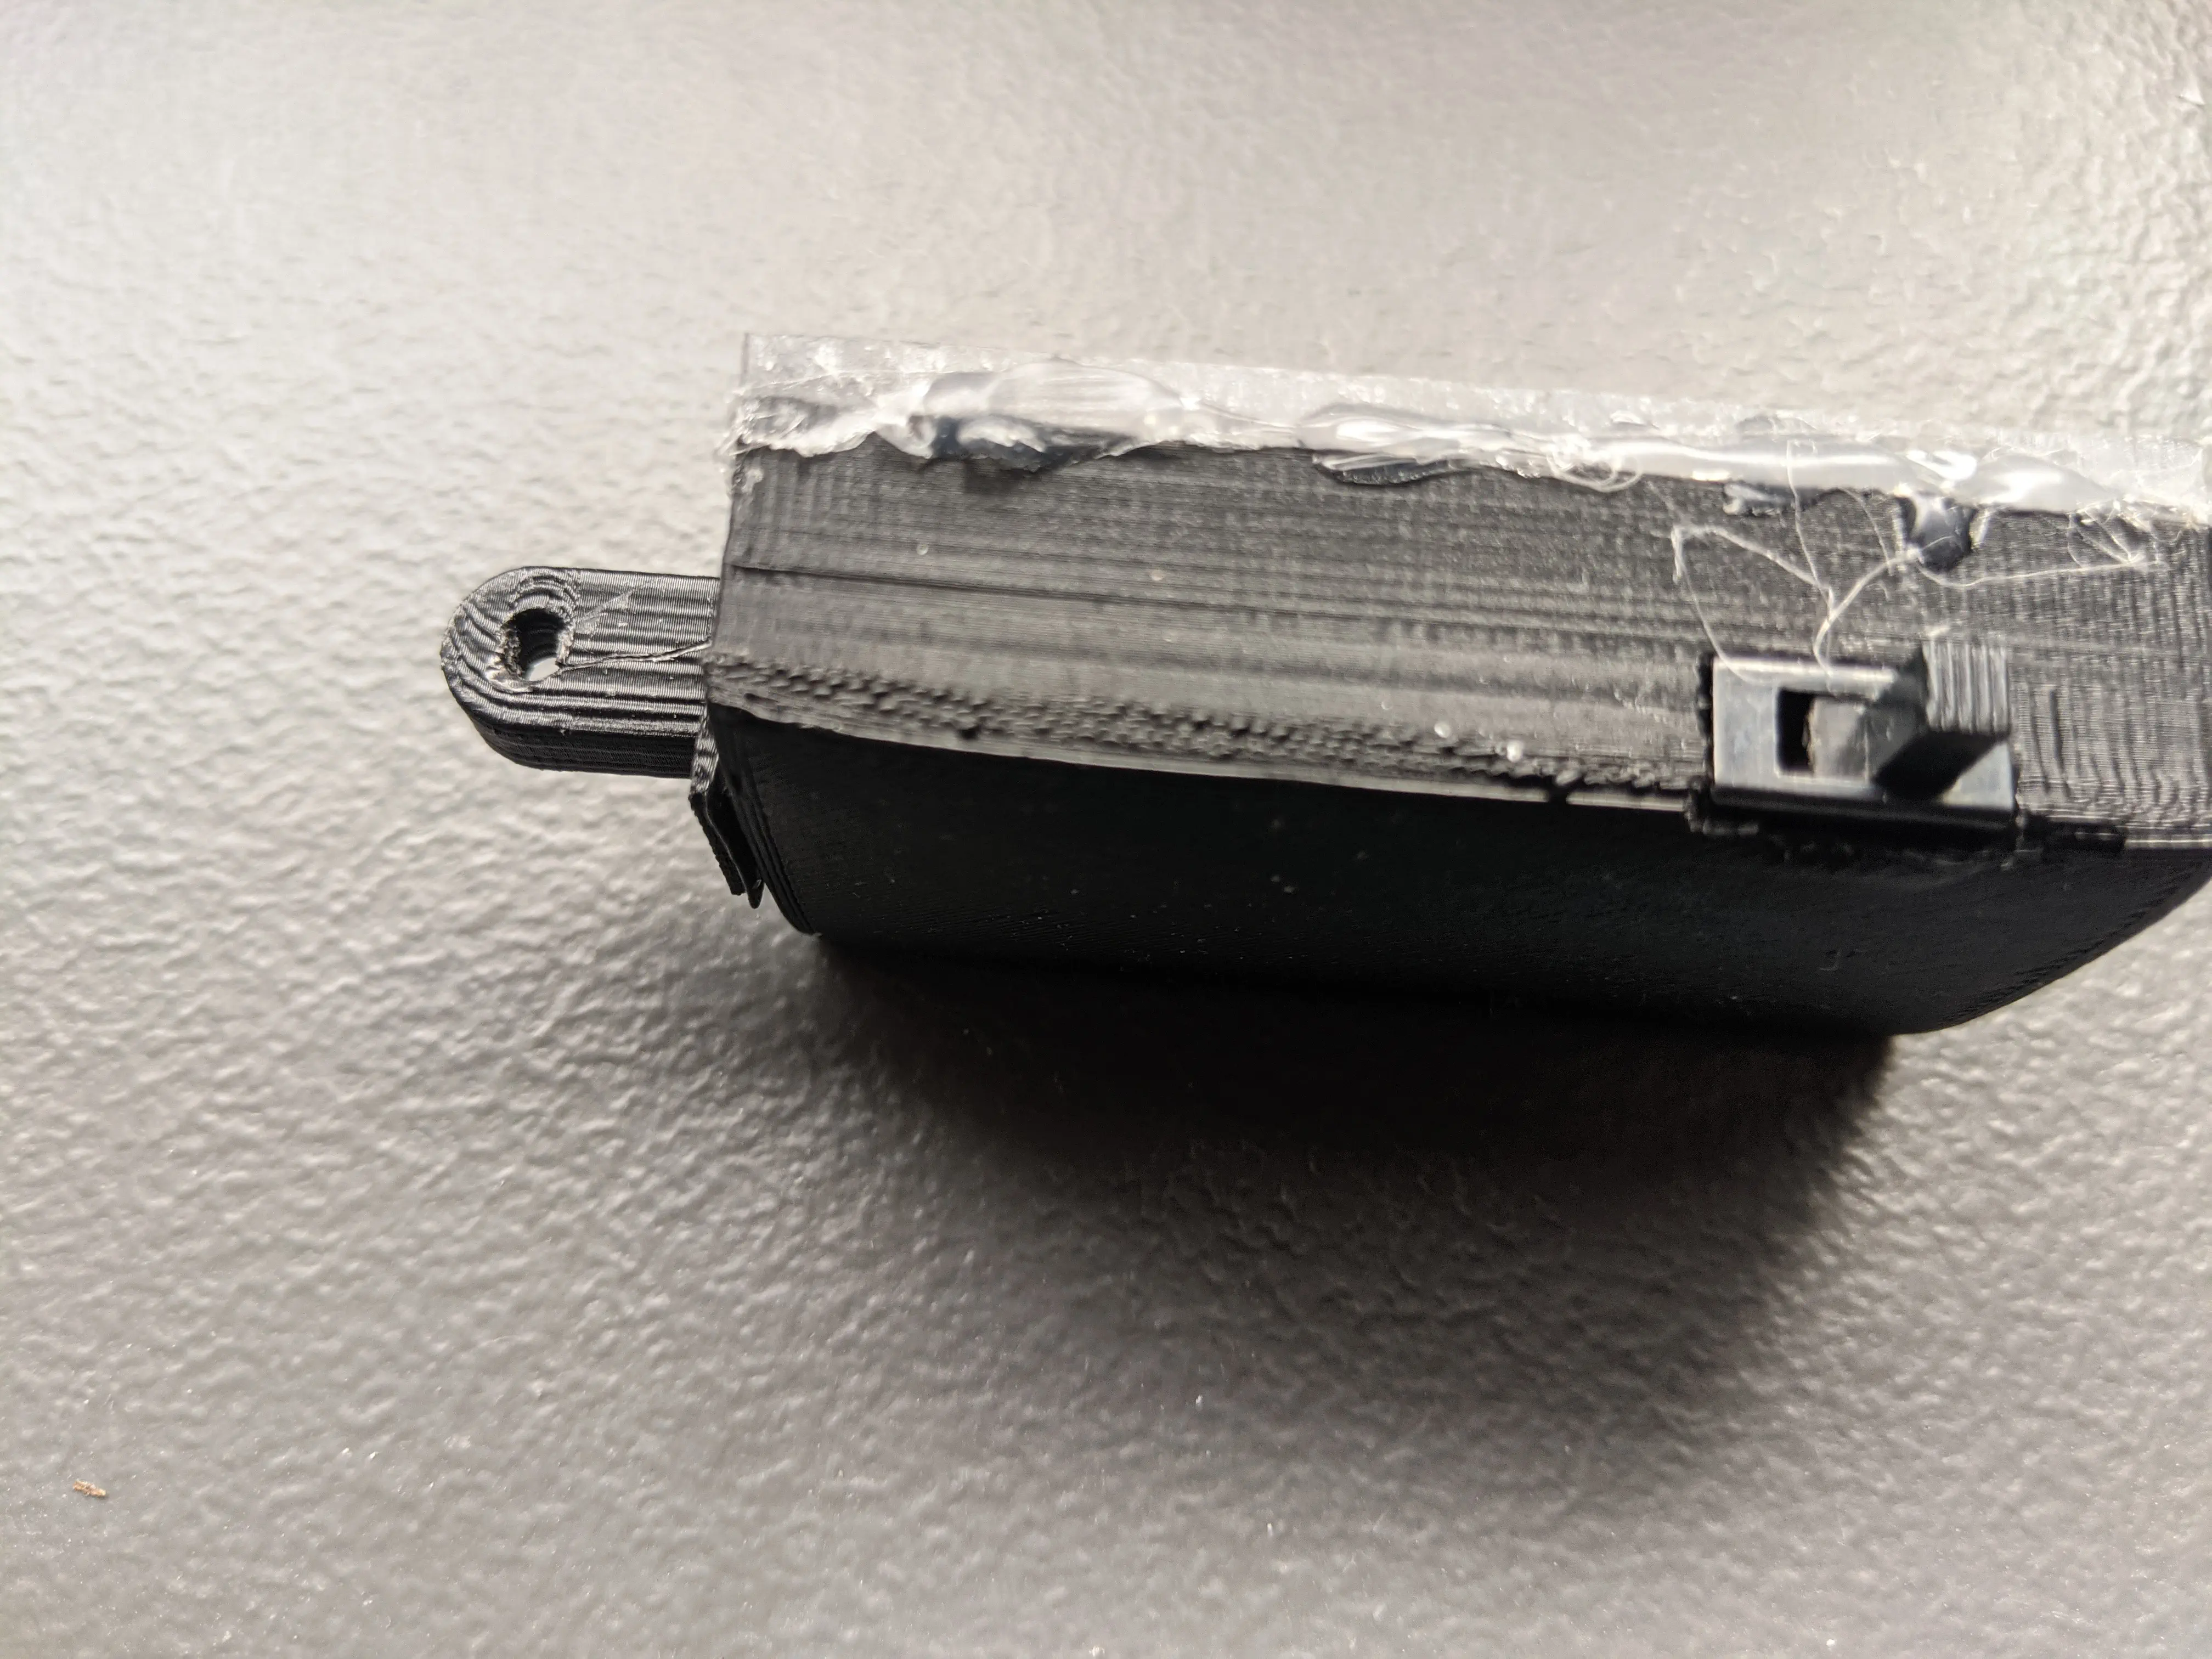
The Printrbot, like most hobbyist-level 3D printers, prints using a technique known as fused deposition modeling (FDM): It works by melting a plastic filament and extruding it in overlapping layers to progressively build an object. When the plastic filament cools, however, it contracts. This can lead to the bottom of the printed object warping:
For some plastics it’s manageable, but with others the effect is even more pronounced and makes that type of plastic unsuitable for printing. That is, of course, unless you keep the bottom of the object warm the entire time so that it doesn’t have a chance to contract. Enter: The bed heater.
Printrbot used to sell an upgrade kit to add such a heater to the Simple Metal. Unfortunately, before I was able commit to buying one the company went under - a victim of the glut of ultra-low-cost printers that hit the market in recent years. That leaves us with only one other option: Let’s hack together our own!
Hack-A-Bed
The first decision is whether we want to power it from 12VDC or 110VAC (i.e: directly from the wall). The “official” kit used a 12V heater, which called for a beefier power supply (an ATX power supply for computers is recommended). A key factor here is how we switch the current: The printer’s control board has a driver MOSFET to directly power a heated bed, but many in the community recommend using an external relay instead. We can verify this ourselves since the Printrboard PCB is open source: At 12V we would likely need around 10A of current to produce a decent heater (100-150W).
My printer has the older Rev. D board, which according to the schematic has a 30A MOSFET (the newer Rev. F boards have one that can tolerate 70A), so we’re OK there.
The PCB trace that connects the pin to the board is over 30mm wide, and the MOSFET itself (RFP30N06LE) has an rDS(on) of 0.047Ω, which at 10A would dissipate 0.47W. The MOSFET is in an un-heatsinked TO-220 case, which generally has a 62.5°C/W temperature rise, meaning we’d be looking at it rising ~30°C. Since it won’t be switched on all the time it will also have a chance to cool, keeping us pretty far from the specified 175°C limit.
All signs point to us being OK just connecting the heated bed directly to the Printrboard, but why do careful engineering when you can just go for overkill: Let’s use a relay and not worry about (discrete) MOSFETs.
If we use a relay, we can use AC to power the heated bed directly from 110V and avoid having to buy a beefy(ier) power supply. I found a solid-state relay on Automation Direct that is capable of switching 10A @ 110VAC. Solid-state means it uses a TRIAC (I think) to switch on/off instead of an electromagnet, saving us from hearing an annoying “click” sound every time it turns on. It’s also has a zero-crossing feature, which means it switches on/off when the AC voltage is at (or near) 0V to help prevent weird effects like interference and arcing. Automation Direct also sells lots of stuff to help us make a neat electrical box: Such as cable glands, and…well…a box.
Now we just need to select a heater: Most of the ones I found for 3D printers were 20cm * 20cm and up, but unfortunately the Printrbot’s build surface only measures 15cm * 15cm. I eventually found an appropriately sized one on Aliexpress, but I later learned you can order them directly from Keenovo, which would be a better choice since the one I found on Aliexpress was only 100W. It’s also helpful to use a heated bed that includes a thermistor: This is a small resistor whose resistance changes in proportion to its temperature, which the Printrboard can measure in order to know when to apply power to the heater. If it’s not included, it must be added on separately by using lots of Kapton (or similarly heat-resistant) tape. Bleck.

In the interest of not having two separate things to plug in, I also ordered a cheap 12V power supply with a similar current rating to the one supplied with the Printrbot.
Last but not least we need cables! The Printrboard exposes male Molex connectors. Not wanting to buy a fancy crimp tool just for the sake of making two connectors, I used a basic 2-pin jumper cable for the heater, and filed down a 4-pin floppy drive power cable from an old computer PSU (who uses floppy drives anymore) for the heated bed. In theory we could actually get away with using a single pin for the heated bed (one is just the 12V rail - we could connect directly to the 12V power supply instead), but I decided to use both just to make the wiring a bit saner.
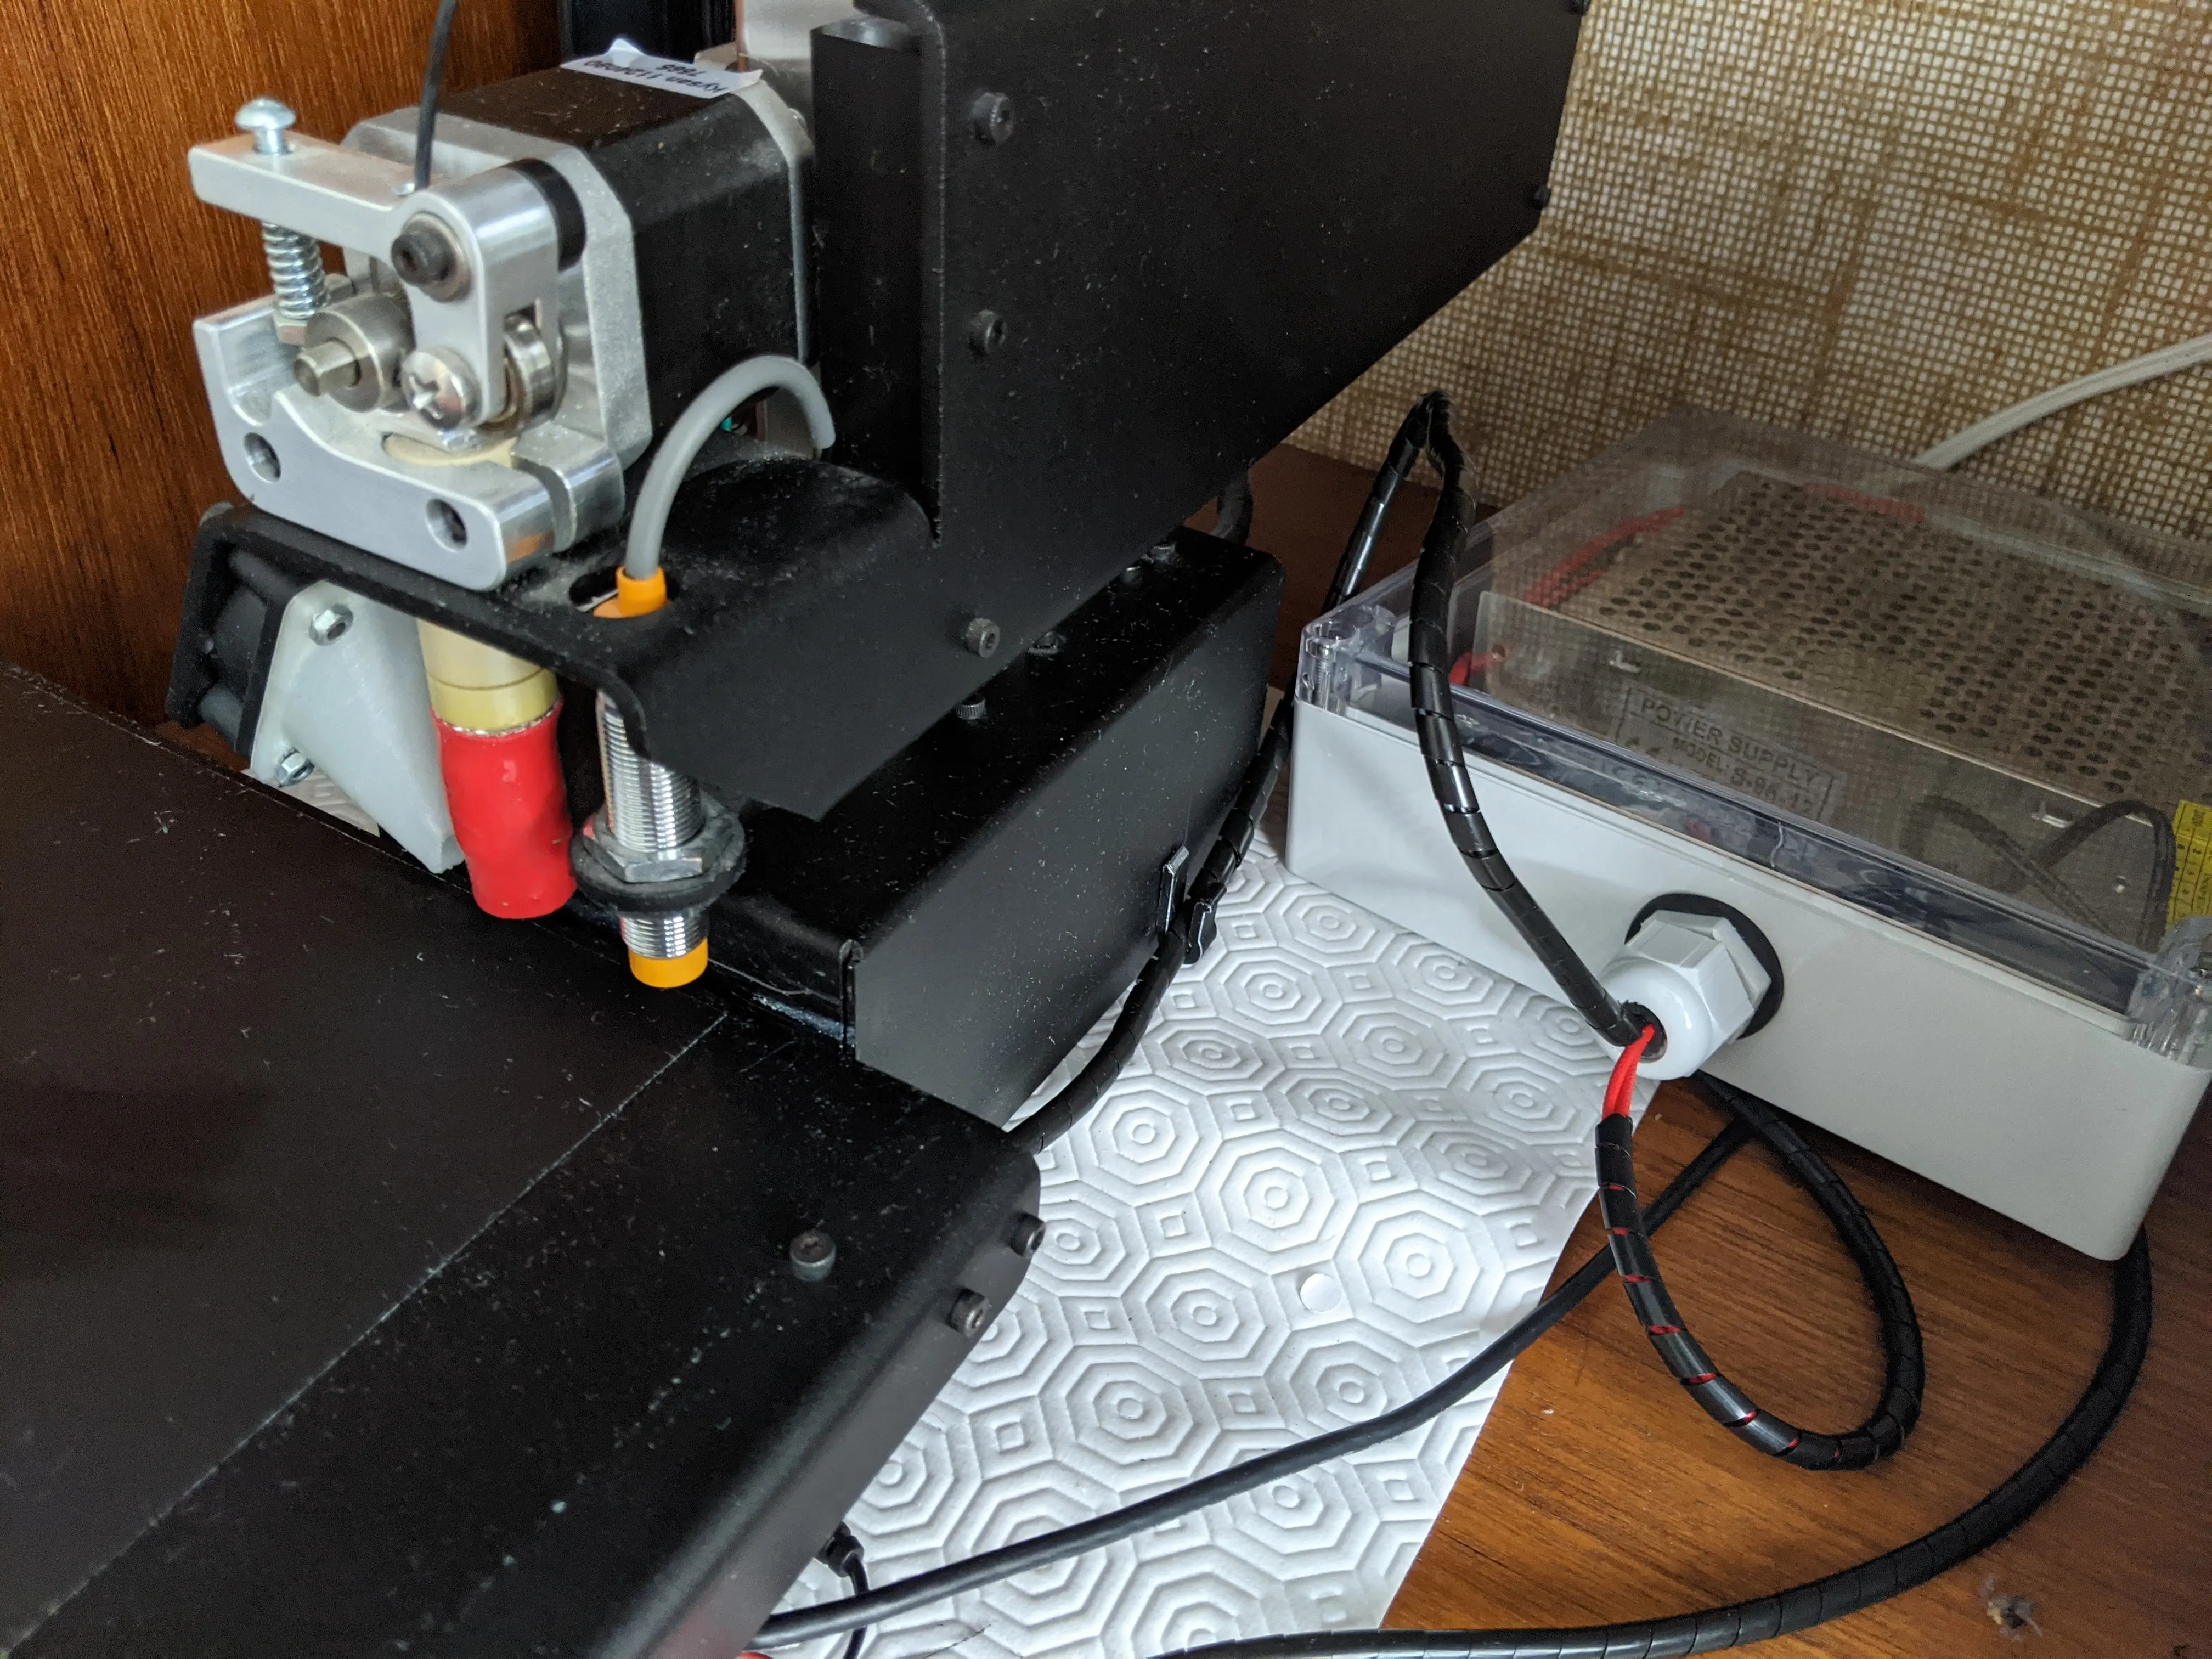
I passed the heated bed and thermistor wires through the small hole meant for an SD card - I never really use the SD card anyways, but it’s still accessible.
It’s a good idea to put a 2A fuse in series with the heater, so nothing catches fire in case there’s a short in the cables. I only had an automotive fuse lying around which is NOT recommended (they’re meant for low voltages) - I’m hoping to upgrade it to a proper 110V-rated fuse soon.
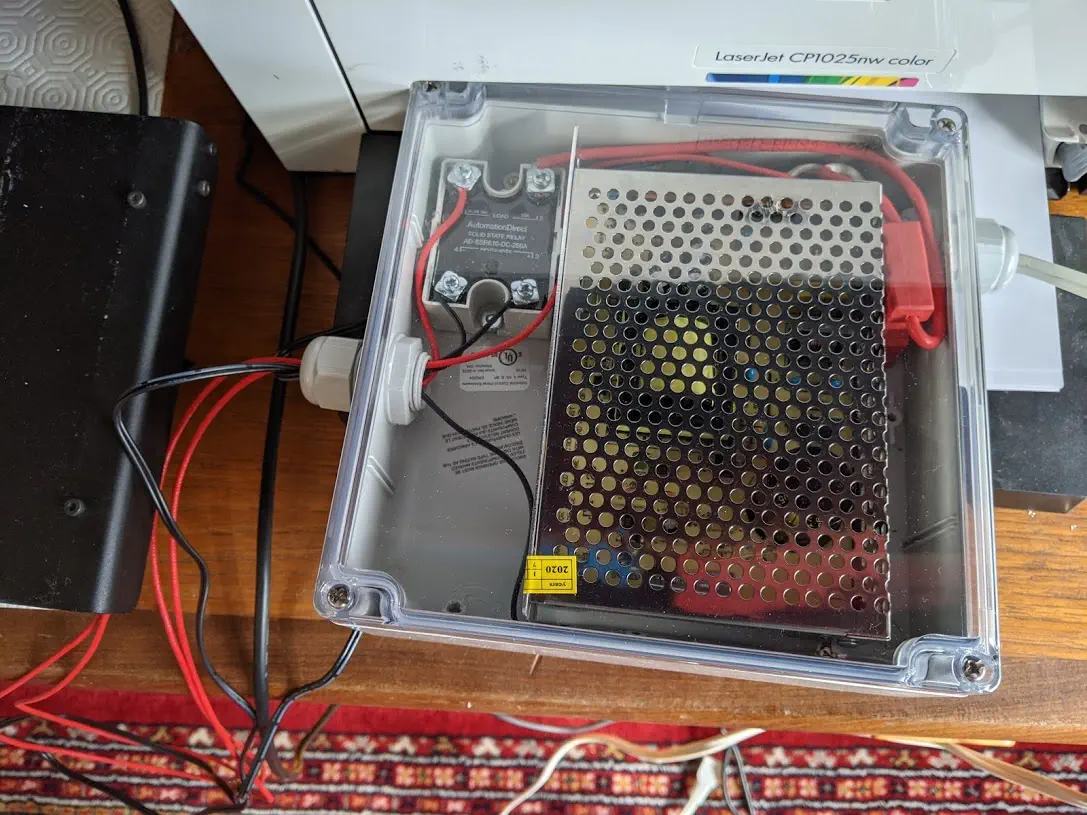
And last but not least, we need some plastic spiral wrap to keep the cables neat! I even 3D printed a plastic clip to secure the cable to the side of the printer.
Firm-Style Ware
You didn’t think you’d get through this without any mention of programming, did you? The Printrboard, unfortunately, is not shipped from the factory with software support for a heated bed. But no worry! Since it uses the open-source Marlin firmware, we can compile a version with heated bed support. For Marlin, all the magic happens in Configuration.h and Configuration_adv.h. First, we have to apply the configuration file appropriate for the Printrbot, which can be found here. The key parameter that needs to be changed is TEMP_SENSOR_BED - for the standard 100k thermistor on most heaters, this must be set to 7. The Marlin firmware has a lot of other neat features that have been added since the Printrbot originally shipped, so it’s worth taking some time to read through them and tweaking the config a bit!
Marlin can be built using our old friend PlatformIO. I got a bunch of compilation errors on my first attempt, which seemed to be caused by USBCON not being defined everywhere it should be (likely an issue with the order of includes). I added build_flags = -DUSBCON in the platformio.ini file under env:at90usb1286_cdc, which solved the issue by forcing that definition in all files. After that it was a simple matter of compiling and flashing the new firmware with Atmel’s FLIP tool.
In order to not lose our config, we should issue an M503 command to print the current settings before flashing the firmware. Copy these somewhere, and then re-send them after the flash is complete followed by an M500 command to save the settings back EEPROM. Beware: some of the commands don’t map exactly 1:1 between different versions of the firmware. I also did a PID auto-tune on the extruder using the M303 command.
Taking It For a Spin Linear Motion
For PLA (the ubiquitous 3D Printer-friendly plastic), the heated bed should be held at around ~60°C, which our setup handles like a charm. When I tried raising the setpoint to 110°C, which is more common for some other plastics like PETG, the 100W heater started to struggle a bit. I think in retrospect I should have used a minimum 150W heater for this project, though the 100W one does seem to be up to the task.
After a bit of Z-offset adjustment (I also bought some BuildTak bed covers), I fired off the print for my Yogurt Alarm. You can easily see the difference:

The whole upgrade cost about $70, which I feel is reasonable for the drastic quality improvement it brings. Props to Printrbot for making such a robust 3D printer that can still be upgraded almost a decade later.